Interactive Object
- fernanda villalobos

- Dec 15, 2019
- 4 min read
Updated: Dec 16, 2019

Description/Summary
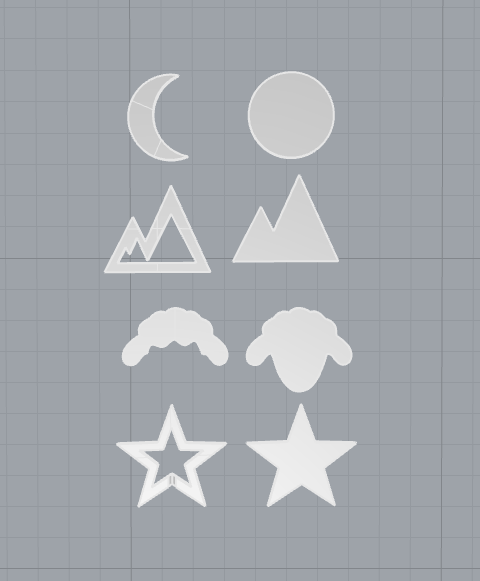
For our final project, we created an interactive moving picture. Artwork is beautiful on its own, but it doesn't have an interactive system. When you go to a museum and observe the paintings, you are engaging with the artwork, but the artwork doesn't respond. Ashleigh and I were inspired by art and shadow boxes, so we decided to create an object that looked like a moving painting. We wanted there to be physical items the user would hold/touch and the artwork would respond. For example, the items we modeled include a moon, mountains, star and sheep. The objects are capacitive touch sensors. If the user touches the moon sensor, then the moon observed in the artwork spins and changes phases. The mountain sensor play a dreamy, nighttime inspired song and the sheep sensor plays the sound of a real sheep. If the user touches the star sensor, then the stars in the sky twinkle. Sound, lights, and movement can be observed at the same time. This offers more interaction because 3 different people can gather together and they can each touch a sensor. From a distant our interactive object looks like a colorful shadow box, or a pop-up book. It was very interesting seeing people's reactions when they touched an object/sensor and the artwork responded with either lights, sound or movement. The sheep sound made people laugh because it was unexpected, and someone told us that our object could be paired with a storybook. The goal for our interactive object was to spark emotion, someone else said they felt like a kid playing with our project and I agreed. Our project could be left on the table alone, and people naturally felt inclined to touch the shapes.
We made circuits, 3D models, illustrations, iterated our code, and tested our design throughout the entire process. The demo video is at the very end.
The sketch below is one of the first sketches for our project. Our initial idea was to have objects that were placed on sensors, and the user would pick them up. We decided to meet with our professor because we were unsure on some materials we needed and the set up of our objects. She gave us the idea of using capacitive touch sensors and said we could make them using copper tape and wire. We still wanted 4 shapes, but now the interaction would be a little different.

Schematics/Circuits
Electrical materials (purchased):
- Adafruit SD Card Reader Breakout Board ($7.50 here)
-Sparkfun Audio Jack Breakout Board: ($3.95 here)
-Micro SD Card and Adapter 2 pk - we only used one for this project ($8.95 here)
-Continuous Micro Servo x2 ($7.50/each here)
-Hamburger Mini Speaker ($4.95 here)
-9V Battery ($0.95 here)
-9V Battery Holder ($2.95 here)
-Stranded-Core Wire: ($2.95 here)
-Solid-Core Wire: ($2.95 here)
-1M ohm resistors ($0.50 here)
The first thing we did was test a capacitive touch sensor using the capacitive sensing library. We made a very simple sensor with copper tape. We used a 1M ohm resistor and attached two wires to each end of the resistor. One wire would be the send pin and the other the receive pin. Below is a video I filmed of Ashleigh testing the sensor.
It was time to start pairing sound, lights, and a motor to the capacitive touch sensors. We started with the sound because we assumed this would take us the longest. The schematic below is the final circuit for our implemented sound, but it took many iterations and changes to get there.
Sound:

We purchased an adafruit micro sd card breakout board, and connected it to the Arduino. We used one of the speakers from a past lab, but the sound was very quiet. We knew we wanted a different speaker but that meant we needed an audio jack breakout board for our new speaker

Below is a video of us testing the sound of our speaker. We converted a sound of a sheep into a .wav file using the settings:
Sample per second (Hz): 1600
Channel: Mono
Bits Per Sample: 8
The audio jack breakout board wasn't implemented into the circuit yet, we just wanted to test the quality of the speaker and the SD card.
Below is the Audio circuit that we implemented in our project, there is two resistors because this circuit has two capacitive touch sensors. Each sensor plays a different sound.

Code:
Lights:

We implemented neopixels into our project because we wanted the sky to have stars. Each neopixel was cut individually so they could be a little more spaced out in the sky. We wanted the lights to twinkle and ended up finding the perfect code for that effect.
Code:
Motor:

For our project we used a small continuous servo motor. At first it was a little difficult getting our motor to work the way we wanted. It didn't completely stop at 90, but then we used myservo.write(93) and that ended up fixing our issue.
Code:
Below is a video of us testing all of our circuits. Our code went through many iterations, we initially wanted everything to be on a single Arduino and code. However, when we had the neopixels and motor controlled on the same Arduino/ code, the neopixels did not twinkle and the motor did not want to stay completely still. Everything worked individually but when we tried putting things together, they didn't work. We also tried pairing the motor with the music, and the motor still moved even if the sensor wasn't touched. We powered the circuits using 9V.
Below is an image of the artwork that we used in our project and the 3D model. Our paper, wood, and acrylic was laser cut.


non-electrical materials (purchased):
-2 sheets of 1/4 inch Sandalwood Plywood (here)
-Colored Construction Paper 9 total ( here)
-Double-sided tape (here)
-Velcro strips (here)
Process of building our enclosure:


We used velcro to stick the circuits to the back wall. They are right next to the door so it was easy to plug in the speaker and power supply


We made a custom 3D printed part for our motor and below is a video of us testing the motor with the moons attached. After making sure all the circuits worked, we started placing each layer one by one into the enclosure. We used foam in between each layer.
Completed product:


In-class interaction/reaction:
Demo Video